

Easy macarons, those delicate, almond-based cookies, often seem like the exclusive domain of pastry chefs and culinary wizards. But fear not, dear becucumber waterers, because today we’re cracking the code and making these delightful treats totally achievable in your own kitchen!
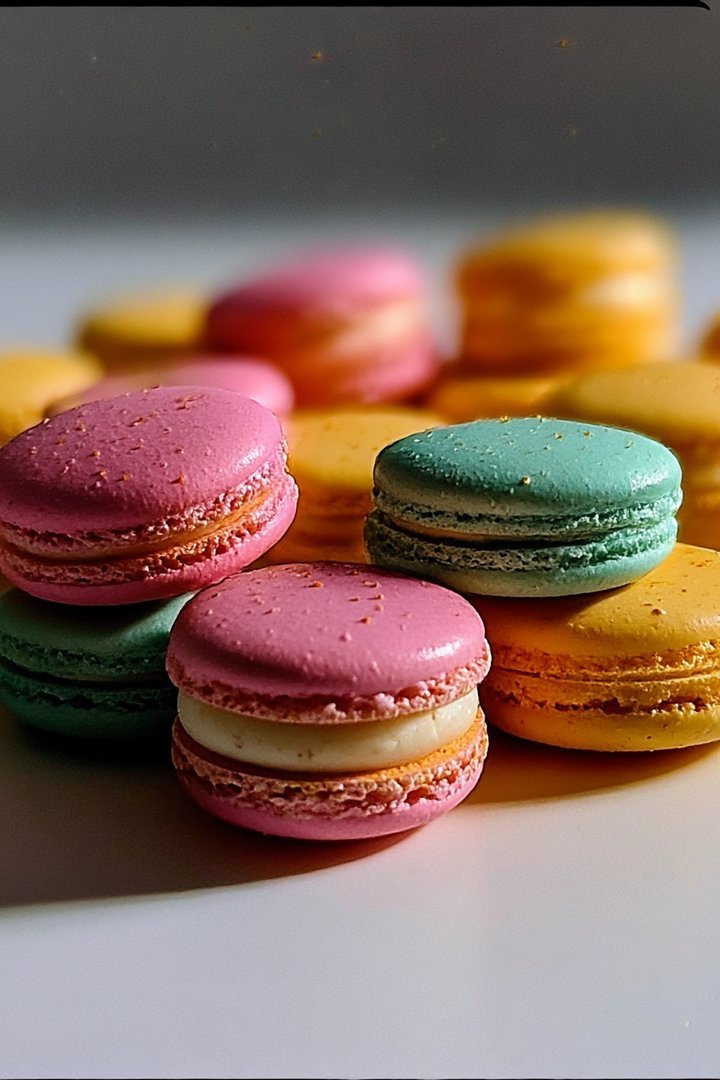
Imagine biting into a perfectly formed macaron, its smooth, glossy shell giving way to a chewy interior, bursting with sweet, delightful flavor. These aren’t just cookies; they’re tiny edible clouds of happiness, perfect for elevating any afternoon tea or simply satisfying your sweet tooth.
Here are a few reasons why you absolutely need this recipe in your life:
- This recipe simplifies the notoriously finicky macaron-making process, making it surprisingly manageable even for baking novices.
- Delicate almond flavor pairs beautifully with a variety of fillings, offering endless customization options to suit your palate.
- Their charming, colorful appearance makes them the perfect treat to impress your friends, family, or even just yourself.
- Whether you need a delightful dessert, a charming gift, or a fancy treat, these macarons fit the bill for any occasion.
Ingredients for Easy Macaron for Becucumber waterers
Here’s what you’ll need to make this delicious dish:
The full ingredients list, including measurements, is provided in the recipe card directly below.
How to Make Easy Macaron for Becucumber waterers
Follow these simple steps to prepare this delicious dish:
Step 1: Prepare the Almond Flour Mixture
Combine almond flour and icing sugar in a bowl. Sift the mixture through a fine-mesh sieve to remove any lumps. This step is crucial for achieving smooth macaron shells. Set aside.
Step 2: Make the Meringue
In a clean, grease-free bowl, beat the egg whites with an electric mixer until soft peaks form. Add cream of tartar and gradually add granulated sugar, continuing to beat until stiff, glossy peaks form. The meringue should be firm enough to hold its shape.
Step 3: Macaronage (Folding)
Add gel food coloring to the meringue and gently fold it in until evenly distributed. Gradually add the almond flour mixture to the meringue, folding gently with a spatula. The goal is to deflate the meringue slightly while incorporating the dry ingredients. The batter should have a lava-like consistency, flowing slowly off the spatula in a ribbon. This process is known as macaronage and is crucial for achieving the right texture.
Step 4: Piping the Macarons
Transfer the macaron batter to a piping bag fitted with a round tip. Pipe small, even circles (about 1.5 inches in diameter) onto baking sheets lined with parchment paper or silicone mats. Leave some space between each macaron.
Step 5: Resting the Macarons
Tap the baking sheets firmly on the counter several times to release any air bubbles. Let the macarons rest at room temperature for 30-60 minutes, or until a skin forms on the surface. This is essential for achieving the characteristic “feet” on the macarons. You should be able to gently touch the surface of the macaron without any batter sticking to your finger.
Step 6: Baking the Macarons
Preheat your oven to 300°F (150°C). Bake the macarons for 12-15 minutes, or until the feet have formed and the shells are set. Let the macarons cool completely on the baking sheets before removing them.
Step 7: Filling and Assembling
Once the macaron shells are completely cool, pipe your favorite filling onto the flat side of one shell and top with another shell, gently pressing them together.
Step 8: Maturing (Optional)
For the best flavor and texture, let the filled macarons mature in the refrigerator for 24 hours before serving. This allows the flavors to meld together and the shells to soften slightly.
Transfer to plates and serve these adorable treats for the perfect finishing touch.
Achieving Macaron Perfection: Expert Tips and Tricks (formated as H2 subheading)
Leave an empty line (space) immediately after the H2 heading before starting the content.
Mastering the art of the macaron can feel like a daunting task, but with a few insider tips, you’ll be whipping up these delicate treats like a seasoned pro in no time. Let’s dive into some secrets to ensure your easy macaron endeavor is a resounding success.
The Importance of Aged Egg Whites (formated as H3 subheading)
Using aged egg whites is a game-changer for macaron success. Aging the egg whites allows some of the moisture to evaporate, resulting in a more stable meringue. Simply separate your eggs a day or two in advance and store the whites in an airtight container in the refrigerator. Let them come to room temperature before using.
Sifting is Your Best Friend (formated as H3 subheading)
Don’t skip the sifting! Sifting almond flour and icing sugar removes any lumps and ensures a smooth, even batter. This is crucial for achieving those flawless macaron shells.
Mastering the Macaronage (formated as H3 subheading)
The macaronage, or folding process, is where the magic (or disaster) happens. The goal is to deflate the meringue slightly while incorporating the dry ingredients. The batter should have a lava-like consistency, flowing slowly off the spatula in a ribbon. Too much folding will result in a runny batter, while not enough folding will result in lumpy, cracked macarons.
The Resting Period: Patience is Key (formated as H3 subheading)
Resist the urge to rush the resting period. Letting the piped macarons rest at room temperature for 30-60 minutes allows a skin to form on the surface. This is what gives macarons their signature “feet.” The surface should be dry to the touch before baking.
Oven Temperature: A Macaron’s Nemesis (formated as H3 subheading)
Oven temperature is crucial for baking macarons. Use an oven thermometer to ensure your oven is accurately calibrated. Macarons are delicate and can easily crack or burn if the oven is too hot. If your oven tends to run hot, you can try lowering the temperature slightly or propping the oven door open a crack.
Silicone Mats vs. Parchment Paper (formated as H3 subheading)
Both silicone mats and parchment paper can be used for baking macarons. Silicone mats provide a more consistent baking surface and can help prevent sticking. Parchment paper is a good alternative if you don’t have silicone mats.
Troubleshooting Common Macaron Problems (formated as H3 subheading)
Cracked shells? Your oven may be too hot, or the batter may not have been folded enough. No feet? The macarons may not have rested long enough, or the oven temperature may be too low. Hollow shells? The batter may have been over-mixed, or the oven temperature may be too high.
Flavor Variations for the Adventurous Baker (formated as H2 subheading)
Leave an empty line (space) immediately after the H2 heading before starting the content.
One of the best things about macarons is their versatility. Once you’ve mastered the basic recipe, the possibilities for flavor combinations are endless. Here are a few ideas to get your creative juices flowing:
Chocolate Macarons (formated as H3 subheading)
Add cocoa powder to the almond flour mixture for a rich chocolate flavor. Fill with chocolate ganache or Nutella.
Vanilla Macarons (formated as H3 subheading)
Add alcohol-free vanilla extract to the meringue for a classic vanilla flavor. Fill with vanilla buttercream or pastry cream.
Lemon Macarons (formated as H3 subheading)
Add lemon zest to the almond flour mixture and lemon juice to the filling for a bright, citrusy flavor. Fill with lemon curd or lemon buttercream.
Coffee Macarons (formated as H3 subheading)
Add instant coffee powder to the almond flour mixture for a coffee flavor. Fill with coffee buttercream or chocolate ganache.
Raspberry Macarons (formated as H3 subheading)
Add freeze-dried raspberry powder to the almond flour mixture for a fruity flavor and vibrant color. Fill with raspberry jam or raspberry buttercream.
Storing Your Easy Macaron for Optimal Freshness (formated as H2 subheading)
Leave an empty line (space) immediately after the H2 heading before starting the content.
Proper storage is essential to maintain the delicate texture and flavor of your homemade macarons. Here’s how to keep them fresh and delicious:
Refrigeration (formated as H3 subheading)
Filled macarons should be stored in an airtight container in the refrigerator for up to 5 days. Allowing them to mature in the refrigerator for 24 hours before serving actually enhances their flavor and texture.
Freezing (formated as H3 subheading)
Unfilled macaron shells can be frozen in an airtight container for up to 2 months. Thaw them completely at room temperature before filling. Filled macarons can also be frozen, but the filling may become slightly soft upon thawing.
Room Temperature (formated as H3 subheading)
Unfilled macaron shells can be stored at room temperature in an airtight container for up to 2 days. However, they are best stored in the refrigerator or freezer to maintain their freshness.
Avoiding Moisture (formated as H3 subheading)
Moisture is the enemy of macarons. Make sure the macaron shells are completely cool before storing them. Avoid storing them in a humid environment, as this can cause them to become sticky.
With a little practice and these helpful tips, you’ll be creating stunning and delicious macarons that will impress everyone who tastes them. Happy baking, and enjoy your macaron journey!
Perfecting the Cooking Process
To achieve the best results when crafting an easy macaron for beginning bakers, it’s wise to organize your steps. First, precisely measure your dry ingredients, then prepare your meringue. While the meringue is whipping, have your baking sheets lined and oven preheated, so you are ready to go.
Add Your Touch
These macarons are like a blank canvas ready for your creativity! Want a bolder flavor? Try adding a pinch of citrus zest to the almond flour mixture. Consider using different fruit preserves or perhaps even a dash of alcohol-free vanilla extract in the buttercream to truly make them your own.
Storing & Reheating
To keep your delightful macarons fresh, store them in an airtight container in the refrigerator. They’ll stay good for up to a week. Before serving, let them sit at room temperature for about 15 minutes for the filling to soften slightly. This allows the flavors to bloom.
Here are some handy tips to guarantee you’re whipping up the *easiest macaron for beginning bakers* every time:
- Use a kitchen scale to measure ingredients, especially the almond flour and sugar, for consistent results; this precise measurement is key for success.
- Make sure your egg whites are properly aged for optimal meringue texture; aged whites whip up higher and give the macarons a perfect rise.
- Don’t overmix the batter; gently fold until the batter flows like lava and forms a ribbon, preventing air loss and shell cracks.
(Personal anecdote formated as paragraph subheading)
My first batch looked like sad little pancakes. But after tweaking the oven temperature and mastering the macaronage, I finally created a batch that was perfect, and the whole family cheered!
Understanding Macarons: Why All the Fuss?
Macarons. The very name evokes images of Parisian patisseries, delicate pastel hues, and an air of undeniable sophistication. These aren’t your average cookies; they’re a culinary tightrope walk, a test of precision, and a testament to the baker’s patience. But fear not, aspiring macaron maestros! We’re about to demystify these delightful treats and prove that even “becucumber waterers,” those of us who find ourselves occasionally flummoxed in the kitchen, can conquer the *easy macaron*.
Let’s be honest, the macaron has a reputation. It’s the diva of the dessert world, demanding attention and threatening collapse at the slightest misstep. We’ve all seen the Pinterest fails: cracked shells, hollow interiors, and feet that are less “petite” and more “Frankenstein.” But the truth is, with the right guidance and a few insider secrets, crafting a perfect macaron is absolutely achievable.
This isn’t about shortcuts; it’s about understanding the science behind the sweetness. We’ll break down each step, explaining the “why” behind the “how,” so you can approach your macaron-making adventure with confidence and, most importantly, a sense of humor. Because let’s face it, even the pros have macaron mishaps. It’s all part of the delicious journey!
Ingredients: The Foundation of Your Macaron Empire
Forget complicated ingredient lists. We’re sticking to the essentials, focusing on quality over quantity. Here’s what you’ll need to assemble your *easy macaron for beginning bakers* arsenal:
- **Almond Flour:** This is the backbone of our macaron, providing that signature chewy texture. Make sure it’s finely ground and blanched (skins removed) for the smoothest possible shells. A coarse almond flour will result in lumpy macarons, and nobody wants that. Think of it as the difference between a luxurious silk gown and burlap sack.
- **Icing Sugar (Powdered Sugar):** This sweetens the deal and contributes to the macaron’s delicate structure. Make sure it’s fresh and free of lumps. Sifting it is highly recommended to avoid any gritty surprises.
- **Granulated Sugar:** This is for our meringue, adding stability and shine. Regular granulated sugar works perfectly.
- **Egg Whites:** The magical ingredient that transforms into a fluffy cloud of meringue. We’ll talk about aging them later.
- **Cream of Tartar (Optional):** A pinch of this helps stabilize the meringue and gives it extra volume. It’s not strictly necessary, but it can be a helpful insurance policy, especially if you’re new to meringue-making.
- **Food Coloring (Optional):** For adding a splash of color and personality to your macarons. Gel food coloring is best, as it won’t add extra liquid to the batter.
- **Filling of Choice:** Get creative! Buttercream, ganache, fruit preserves – the possibilities are endless. Just make sure it’s not too wet, or it will make your macarons soggy.
Remember, quality ingredients are the key to success. Don’t skimp on the almond flour or icing sugar. Treat them with respect, and they will reward you with delicious macarons.
Equipment: Setting the Stage for Success
You don’t need a fancy, professional kitchen to make *an easy macaron*. But there are a few essential tools that will make your life much easier:
- **Kitchen Scale:** This is non-negotiable. Macarons are all about precision, and measuring by volume is a recipe for disaster. A kitchen scale ensures that your ingredients are perfectly balanced.
- **Stand Mixer or Hand Mixer:** For whipping up that glorious meringue. A stand mixer is ideal, as it frees up your hands to attend to other tasks, but a hand mixer will work just fine.
- **Sifter:** To ensure your almond flour and icing sugar are lump-free.
- **Piping Bag and Round Tip:** For creating those perfectly round macaron shells. A large round tip (about 1/2 inch) is recommended.
- **Parchment Paper or Silicone Baking Mats:** To prevent your macarons from sticking to the baking sheet.
- **Baking Sheets:** Heavy-duty baking sheets are best, as they distribute heat evenly.
- **Rubber Spatula:** For gently folding the batter.
- **Toothpick:** For popping any air bubbles on the surface of the piped macarons.
With these tools in hand, you’re ready to embark on your macaron adventure. Remember, preparation is key. Having everything set up before you start mixing will make the process much smoother and less stressful.
The Meringue: The Soul of the Macaron
The meringue is the heart and soul of the macaron. It’s what gives the shells their light, airy texture and those signature “feet.” There are a few different types of meringue, but we’ll be using the French meringue method for our *easy macaron*, as it’s the simplest and most straightforward.
Here’s the breakdown:
1. **Aging the Egg Whites: ** This is a crucial step that many beginners skip. Aging egg whites allows them to dry out slightly, which results in a more stable meringue. Simply separate the egg whites from the yolks a day or two in advance and store them in an airtight container in the refrigerator. Let them come to room temperature before using.
2. **Whipping the Meringue: ** In a clean, grease-free bowl, beat the egg whites with a pinch of cream of tartar (if using) until soft peaks form. Gradually add the granulated sugar, beating until stiff, glossy peaks form. The meringue should be firm enough to hold its shape but not dry or curdled. Think of it as the texture of shaving cream.
3. **Adding Food Coloring (Optional): ** If you’re using food coloring, add it now, a drop at a time, until you reach your desired shade. Be careful not to overmix, as this can deflate the meringue.
A perfectly whipped meringue is essential for macaron success. It should be light, airy, and stable enough to hold its shape. Don’t be afraid to experiment and practice until you get it just right.
Macaronage: The Art of Folding
Macaronage. It sounds fancy, doesn’t it? But it’s simply the process of folding the almond flour mixture into the meringue. This is where many macaron beginners go wrong. Overmixing or undermixing can both lead to disastrous results.
Here’s how to do it right:
1. **Combining Dry Ingredients: ** In a separate bowl, whisk together the almond flour and icing sugar.
2. **Adding to the Meringue: ** Gradually add the dry ingredients to the meringue, folding gently with a rubber spatula. Use a circular motion, scraping down the sides of the bowl as you go.
3. **The “Lava” Consistency: ** This is the key to perfect macaronage. The batter should be thick and flowing, like lava. It should fall off the spatula in a ribbon and slowly disappear back into the bowl. If it’s too stiff, the macarons will be cracked. If it’s too runny, they will spread.
4. **Testing the Consistency: ** To test the consistency, draw a figure eight with the spatula in the batter. If the figure eight slowly disappears back into the batter, you’ve reached the perfect consistency.
Macaronage is a delicate balance. It takes practice and patience to master. Don’t be discouraged if your first few batches aren’t perfect. Just keep practicing, and you’ll eventually get the hang of it.
Piping and Resting: Patience is a Virtue
Now that your batter is perfectly macaronaged, it’s time to pipe those beautiful little shells.
1. **Preparing the Piping Bag: ** Fit a piping bag with a large round tip.
2. **Filling the Bag: ** Fill the piping bag with the macaron batter.
3. **Piping the Shells: ** Pipe even circles onto the prepared baking sheets. Aim for about 1.5 inches in diameter, leaving a little space between each shell.
4. **Tapping the Baking Sheet: ** Tap the baking sheet firmly on the counter a few times to release any air bubbles.
5. **Popping Air Bubbles: ** Use a toothpick to pop any remaining air bubbles on the surface of the shells.
Now comes the hardest part: the resting period. This is crucial for developing those signature macaron “feet.” Let the piped shells rest at room temperature for 30-60 minutes, or until a skin forms on the surface. You should be able to gently touch the shells without any batter sticking to your finger.
Baking: The Moment of Truth
Preheat your oven to 300°F (150°C). The baking time will vary depending on your oven, but it’s typically around 12-15 minutes.
1. **Baking the Macarons: ** Place the baking sheet in the preheated oven.
2. **Checking for Feet: ** Keep a close eye on the macarons. After about 5-7 minutes, you should see the “feet” starting to form.
3. **Rotating the Baking Sheet: ** Rotate the baking sheet halfway through baking to ensure even browning.
4. **Cooling Completely: ** Once the macarons are baked, remove them from the oven and let them cool completely on the baking sheet before removing them.
Filling and Assembly: The Grand Finale
Now for the fun part: filling and assembling your *easy macaron*.
1. **Choosing a Filling: ** Get creative with your fillings! Buttercream, ganache, fruit preserves, or even a simple chocolate spread are all great options.
2. **Piping the Filling: ** Pipe a small amount of filling onto the flat side of one macaron shell.
3. **Sandwiching the Shells: ** Gently sandwich another macaron shell on top.
4. **Refrigerating (Optional): ** Refrigerating the assembled macarons for a few hours will allow the flavors to meld together.
Conclusion for Easy Macaron for Becucumber waterers:
Creating these delightful treats might seem intimidating, but fear not, even the most becucumber waterers can conquer the macaron. Remember the key is in the details: proper macaronage, gel food coloring, the essential resting period, and a keen eye on the oven temperature. Don’t be discouraged by a few cracks or imperfections along the way. Every batch is a learning experience, and even imperfect macarons are delicious. With a little practice, you’ll be whipping up these delicate delights in no time. So, go ahead, embrace the challenge, and enjoy the sweet rewards!
Print
Easy Macaron for Becucumber waterers
Delicious easy macaron for becucumber waterers recipe with detailed instructions and nutritional information.
- Total Time: 35 minutes
- Yield: 4 servings
Ingredients
- Almond Flour with 100g measurement
- Powdered Sugar with 100g measurement
- Egg Whites (aged) with 50g measurement
- Granulated Sugar with 50g measurement
- Food Coloring (gel) with a few drops measurement
- Vanilla Extract with 1/2 teaspoon measurement
- Cream of Tartar with 1/8 teaspoon measurement
Instructions
- Step 1: Sift together almond flour and powdered sugar into a bowl. Discard any large pieces that don't pass through the sifter.
- Step 2: In a separate, clean and grease-free bowl, beat egg whites with cream of tartar until soft peaks form. Gradually add granulated sugar, beating until stiff, glossy peaks form.
- Step 3: Add food coloring and vanilla extract to the meringue and gently fold to combine.
- Step 4: Gradually add the dry ingredients to the meringue, folding gently with a spatula. Be careful not to overmix; the batter should flow like lava. This process is called "macaronage".
- Step 5: Transfer the batter to a piping bag fitted with a round tip. Pipe evenly sized circles onto a baking sheet lined with parchment paper or a silicone mat.
- Step 6: Tap the baking sheet firmly on the counter several times to release any air bubbles. Let the macarons rest at room temperature for 30-60 minutes, or until a skin forms on the surface. Preheat the oven to 300°F (150°C). Bake for 12-15 minutes, or until the feet have formed and the macarons are set. Let them cool completely on the baking sheet before removing.
Notes
- Store your finished macarons in an airtight container in the refrigerator to keep them chewy and fresh for longer.
- To revive slightly stale macarons, warm them gently in a very low oven (around 200°F/95°C) for a couple of minutes.
- Serve these delicate treats with a scoop of your favorite sorbet or a refreshing glass of iced tea for a delightful afternoon snack.
- Aged egg whites are key for stable meringue: separate your eggs a day or two in advance and store the whites, covered, in the refrigerator for best results.
- Prep Time: 15 minutes
- Cook Time: 20 minutes
- Method: Stovetop
- Cuisine: American
FAQs:
Why are my macarons cracking?
Macarons are notoriously temperamental, but don’t fret! Cracking often happens when the shells develop a skin that’s too thick or dries too quickly. Ensure proper macaronage (the folding process) – the batter should flow like lava. Humidity can also be a culprit, so try baking on a drier day or using a dehumidifier. Oven temperature is also key, ensuring your oven isn’t too hot can make all the difference. With a little patience and tweaking, even becucumber waterers like us can achieve those smooth, delightful tops. Remember, practice makes perfect, and even cracked macarons taste delicious!
Can I freeze macaron shells or filled macarons?
Absolutely! Freezing is a fantastic way to get ahead of the game. You can freeze the unfilled shells in an airtight container for up to a month. When you’re ready to assemble, let them thaw completely at room temperature. Filled macarons also freeze well; this actually allows the flavors to meld together beautifully. Wrap them individually or place them in an airtight container. Thaw them in the refrigerator for a few hours before serving. Now you can enjoy your easy macaron even if you decide to bake way too many.
What kind of food coloring should I use?
Gel food coloring is your best friend when it comes to macarons. Liquid food coloring can alter the consistency of the batter, which can lead to flat or runny macarons. Gel food coloring is much more concentrated, so you only need a tiny amount to achieve vibrant colors. Plus, it won’t add excess liquid to your precious batter. Experiment with different colors to create stunning and colorful treats. Remember, a little goes a long way. So start with a small dot and gradually add more until you achieve your desired hue.
What’s the secret to getting those perfect “feet” on macarons?
Ah, the coveted macaron “feet”! The secret lies in the resting period. After piping the macarons onto baking sheets, you must let them sit at room temperature for 30-60 minutes, or until a skin forms on the surface. This skin allows the macarons to rise evenly in the oven, creating those signature ruffled feet. Don’t skip this step! It’s crucial for achieving that professional-looking result. Patience is key, my friends. With this simple trick, you’ll be well on your way to macaron success.


Leave a Comment