

Oh, the sheer delight of a caramel that melts in your mouth, whispering sweet nothings of autumn orchards and cozy evenings! Imagine sinking your teeth into a soft, chewy square of pure apple cider bliss.
These **delicious homemade apple cider caramels for fall bliss** aren’t just a treat; they’re a nostalgic hug, a symphony of sweet and tart dancing on your tongue, perfect for crisp autumn days and heartwarming gatherings. Let’s make some magic!
- Effortlessly craft these delightful treats with simple, straightforward instructions, even if you’re new to candy making.
- Experience the perfect balance of sweet apple cider and buttery caramel, creating an irresistible flavor profile.
- These caramels boast a beautiful golden hue, making them a stunning addition to any fall dessert table.
- Adaptable for gifting or personal indulgence, these caramels are the perfect sweet ending to any meal.
Ingredients for Delicious Homemade Apple Cider Caramels for Fall Bliss
Here’s what you’ll need to make this delicious dish:
The full ingredients list, including measurements, is provided in the recipe card directly below.
How to Make Delicious Homemade Apple Cider Caramels for Fall Bliss
Follow these simple steps to prepare this delicious dish:
Step 1: **Prepare the Apple Cider Reduction**
In a saucepan, simmer the apple cider over medium heat until it reduces to about 1 cup. This concentrates the apple flavor for a richer caramel.
Step 2: **Combine Sugar and Corn Syrup**
In a heavy-bottomed saucepan, combine the granulated sugar and corn syrup. This mixture forms the base of the caramel and ensures a smooth texture.
Step 3: **Cook the Caramel**
Cook the sugar mixture over medium heat, stirring constantly until the sugar dissolves and the mixture turns a light amber color. Keep a close eye on it to prevent burning!
Step 4: **Add Butter and Cream**
Carefully whisk in the butter and heavy cream. Be cautious as the mixture will bubble vigorously. Stir until the butter is melted and the mixture is smooth.
Step 5: **Cook to the Correct Temperature**
Continue cooking, stirring occasionally, until the mixture reaches 245°F (118°C) on a candy thermometer. This is crucial for achieving the perfect caramel consistency.
Step 6: **Stir in Vanilla and Salt**
Remove from heat and stir in the Alcohol-free vanilla extract and salt. This adds the final touch of flavor to the delicious caramels.
Step 7: **Pour and Cool**
Pour the caramel into a buttered 8×8 inch baking dish lined with parchment paper. Let it cool completely at room temperature, or in the refrigerator for faster setting.
Step 8: **Cut and Wrap**
Once firm, lift the caramel out of the dish using the parchment paper. Cut into squares and wrap each caramel individually in wax paper for easy storage and gifting. Enjoy these delicious homemade apple cider caramels for fall bliss!
Mastering the Art of Apple Cider Caramel Creation (h2)
Making caramels might seem intimidating, but fear not! With a few insider tips, you’ll be whipping up **delicious homemade apple cider caramels for fall bliss** like a seasoned pro. Think of it as a sweet science experiment – with incredibly tasty results.
The Right Cider Makes All the Difference (h3)
First and foremost, the quality of your apple cider is paramount. Steer clear of the clear, watery stuff labeled “apple juice.” You want the real deal: unfiltered, unpasteurized apple cider, the kind that screams “autumn orchard” with every sip. The richer and more flavorful the cider, the more intense the apple flavor in your caramels. You can even experiment with different cider varieties for unique flavor profiles.
Temperature is Your Best Friend (and Sometimes Your Frenemy) (h3)
A candy thermometer is your lifeline in the world of caramel making. Don’t even think about attempting these **delicious homemade apple cider caramels for fall bliss** without one. Reaching that magical 245°F (118°C) is the key to the perfect chewy texture. Undercook them, and you’ll have a gooey mess. Overcook them, and you’ll end up with hard, brittle candy. Accuracy is key!
Stirring the Pot (But Not Too Much) (h3)
Stirring is essential to prevent burning and ensure even cooking, but resist the urge to stir constantly. Over-stirring can introduce air bubbles and lead to a grainy texture. Gently stir occasionally, especially as the mixture thickens and approaches the target temperature. Think of it as a mindful meditation, not a frantic frenzy.
The Importance of a Heavy-Bottomed Pan (h3)
A heavy-bottomed saucepan is your secret weapon against scorching. It distributes heat evenly, preventing hot spots that can burn the caramel. A thin-bottomed pan is a recipe for disaster (literally!). Invest in a good quality saucepan; your caramels will thank you.
Cooling is a Virtue (h3)
Patience, young grasshopper! Let the caramels cool completely before cutting and wrapping. Rushing the process can result in sticky, misshapen caramels. Allow them to firm up at room temperature or, for faster results, pop them in the refrigerator. Just remember to bring them back to room temperature before serving for optimal chewiness.
Variations to Elevate Your Apple Cider Caramels (h2)
Want to take your **delicious homemade apple cider caramels for fall bliss** to the next level? Get creative with these delicious variations! Think of these as flavor boosters, adding extra layers of deliciousness to an already amazing treat.
Spiced Apple Cider Caramels (h3)
Add a pinch of ground cinnamon, nutmeg, or cloves to the caramel mixture for a warm, spiced twist. These flavors perfectly complement the apple cider, creating a cozy, autumnal treat.
Salted Apple Cider Caramels (h3)
Sprinkle a generous amount of flaky sea salt on top of the caramels after pouring them into the dish. The salt enhances the sweetness and adds a delightful textural contrast.
Apple Cider Caramel Swirls (h3)
Drizzle melted white chocolate or dark chocolate over the cooled caramels and swirl it with a toothpick or knife. This adds a touch of elegance and decadence to your **delicious homemade apple cider caramels for fall bliss**.
Nutty Apple Cider Caramels (h3)
Stir in chopped pecans, walnuts, or almonds into the caramel mixture before pouring it into the dish. This adds a satisfying crunch and nutty flavor that complements the apple and caramel beautifully.
Apple Cider Caramel Dips (h3)
Melt the cooled caramels with a tablespoon of cream to make a delicious apple cider caramel dip. Serve with apple slices, pretzels, or graham crackers for a fun and interactive dessert.
Troubleshooting Your Apple Cider Caramel Catastrophes (h2)
Even the best bakers encounter occasional kitchen mishaps. Here’s how to troubleshoot common problems with your **delicious homemade apple cider caramels for fall bliss**. Because let’s face it, sometimes things go sideways, even with the best intentions.
My Caramels are Too Hard (h3)
You likely overcooked the caramel. Next time, make sure to remove it from the heat as soon as it reaches 245°F (118°C). You can also try adding a tablespoon or two of cream to the melted caramel to soften it up.
My Caramels are Too Soft (h3)
You probably undercooked the caramel. The next batch, ensure the mixture reaches 245°F (118°C) on a candy thermometer. If your current batch is too soft, you can try re-cooking the caramel to a higher temperature, but be careful not to burn it.
My Caramels are Grainy (h3)
Graininess can be caused by sugar crystallization. Make sure to use corn syrup, which helps prevent crystallization. Avoid over-stirring the caramel, as this can also contribute to a grainy texture.
My Caramels are Burning (h3)
Burning is usually caused by uneven heat distribution. Use a heavy-bottomed saucepan to ensure even cooking. Keep a close eye on the caramel and stir frequently, especially as it thickens.
My Caramels are Sticking to the Pan (h3)
Make sure to grease the baking dish thoroughly with butter and line it with parchment paper. This will prevent the caramels from sticking and make it easier to remove them.
Serving Suggestions for Your Fall Apple Cider Delights (h2)
Okay, so you’ve made these amazing **delicious homemade apple cider caramels for fall bliss**. Now what? Here are some creative ways to serve and enjoy them, because presentation is half the battle, right?
The Classic Treat (h3)
Individually wrap the caramels in wax paper and offer them as a sweet treat after dinner. They’re perfect for satisfying your sweet tooth and leave a lasting impression.
Gifting Goodness (h3)
Package the caramels in decorative boxes or tins and give them as gifts to friends, family, or colleagues. They make a thoughtful and homemade present that everyone will appreciate.
Dessert Board Star (h3)
Include the caramels on a dessert board alongside other fall favorites like apple slices, cheese, nuts, and dried fruit. This creates a beautiful and delicious spread for any gathering.
Hot Beverage Buddy (h3)
Enjoy a caramel alongside a cup of hot apple cider, coffee, or tea. The warm beverage complements the sweet and chewy caramel perfectly.
Caramel Apple Upgrade (h3)
Melt the caramels and use them as a coating for caramel apples. Roll the apples in chopped nuts, sprinkles, or chocolate chips for an extra touch of flair.
With these tips and tricks, you’re well on your way to becoming an apple cider caramel connoisseur. Enjoy the process, experiment with flavors, and most importantly, have fun creating these **delicious homemade apple cider caramels for fall bliss**! After all, life is too short for boring candy.
Perfecting the Cooking Process

For the most amazing apple cider caramels, melt the butter first, then whisk in the sugar and cider. Cooking in this order ensures the sugar dissolves evenly, preventing a grainy texture in your final, utterly irresistible, candies.
Add Your Touch
Want to jazz things up? Consider a dash of cinnamon or nutmeg for extra warmth. Chopped pecans or walnuts can also add a delightful crunch. Feel free to use brown sugar for a richer, more molasses-like flavor.
Storing & Reheating
Store these delectable treats in an airtight container at room temperature. They should last for about a week, but honestly, they probably won’t! No need to reheat—simply unwrap and enjoy the autumnal bliss.
Crafting Caramel Perfection
: Chef’s Tips
- Use a candy thermometer! This is crucial for achieving the perfect soft-ball stage and preventing rock-hard or overly gooey caramels. Trust me, I learned this the hard way.
- Stir constantly while cooking to prevent scorching and ensure even heat distribution. No one wants burnt caramel, unless you are aiming for a bitter flavor!
- Line your pan with parchment paper for easy removal. Trying to pry sticky caramel from a pan is a recipe for disaster, and possibly a missing fingernail.
(Personal anecdote)
I once made these for a fall bonfire, and they were gone within minutes. My friend swore they were the best thing he’d ever tasted, and now I get requests for them every year.
Okay, folks, let’s talk about something near and dear to my heart: Delicious Homemade Apple Cider Caramels for Fall Bliss. I know, I know, caramel can sound intimidating. Visions of burnt sugar and sticky messes dance in your head, right? But trust me, this recipe is so easy, even I can do it (and I’ve been known to set off the smoke alarm just boiling water). These aren’t just any caramels; they’re a celebration of fall, a burst of apple-cinnamon goodness that will make you want to curl up with a cozy blanket and a good book.
Why apple cider caramels, you ask? Well, picture this: crisp autumn air, the scent of fallen leaves, and the taste of sweet, tangy apple cider. Now, imagine all that concentrated into a chewy, melt-in-your-mouth caramel. Are you drooling yet? I am. These little gems are perfect for gifting, sharing (if you’re feeling generous), or simply hoarding for yourself. No judgment here.
The Allure of Apple Cider Caramels
Seriously, what’s not to love? The combination of sweet caramel and the bright, fruity tang of apple cider is simply divine. These aren’t your grandma’s caramels (unless your grandma is super cool and makes gourmet candy). They’re a sophisticated treat with a touch of rustic charm, perfect for impressing your friends, family, or that special someone. Plus, they’re incredibly versatile. You can add nuts, spices, or even a drizzle of chocolate for an extra touch of indulgence. This recipe for Delicious Homemade Apple Cider Caramels for Fall Bliss will transform any autumn gathering.
Gathering Your Ingredients for Caramel Magic
Before we dive into the caramel-making madness, let’s make sure you have everything you need. This recipe is relatively simple, but quality ingredients make all the difference.
Here’s what you’ll need for these Delicious Homemade Apple Cider Caramels for Fall Bliss:
- 1 cup (2 sticks) unsalted butter
- 2 cups granulated sugar
- 1 cup apple cider (the good stuff, not the watery kind)
- 1 cup heavy cream
- ½ teaspoon salt
- 1 teaspoon Alcohol-free vanilla extract (optional, but highly recommended)
- Pinch of cinnamon or nutmeg (optional, for extra warmth)
See? Nothing too crazy. Just a few basic ingredients and a whole lot of love. Make sure your butter is high quality; it really affects the final flavor of the caramels. The apple cider is critical.
The Apple Cider Showdown: Choosing the Right Cider
Okay, let’s talk apple cider. Not all cider is created equal. You want the real deal, the kind that’s bursting with apple flavor and has that slightly cloudy appearance. Avoid the clear, watery stuff that tastes like sweetened apple juice. Look for cider that’s labeled “fresh-pressed” or “unfiltered.” And if you can find local cider, even better! Supporting your local farmers and getting the best-tasting cider? It’s a win-win. Remember, Delicious Homemade Apple Cider Caramels for Fall Bliss start with quality cider.
Step-by-Step Caramel Creation: The Recipe
Alright, buckle up, buttercups! It’s time to make some caramel magic. Don’t be intimidated; I’m here to guide you every step of the way. And remember, even if you mess up the first time, you can always try again. That’s the beauty of cooking (and eating).
Here’s the recipe for Delicious Homemade Apple Cider Caramels for Fall Bliss, broken down into easy-to-follow steps:
1. Prepare Your Pan: Line an 8×8 inch baking pan with parchment paper, leaving some overhang on the sides. This will make it easy to lift the caramels out later.
2. Melt the Butter: In a medium saucepan, melt the butter over medium heat.
3. Add Sugar and Cider: Stir in the granulated sugar and apple cider. Bring to a boil, stirring constantly until the sugar is dissolved.
4. Cook to Soft-Ball Stage: Reduce the heat to medium-low and continue to cook, stirring occasionally, until the mixture reaches the soft-ball stage (235-240°F on a candy thermometer). This will take about 20-30 minutes. Be patient! This is where the magic happens.
5. Stir in Cream and Salt: Remove from heat and carefully stir in the heavy cream and salt. The mixture will bubble up, so be careful.
6. Return to Heat: Return the saucepan to medium heat and cook, stirring constantly, until the mixture reaches the firm-ball stage (245-250°F on a candy thermometer). This will take another 5-10 minutes.
7. Add Vanilla and Spices (Optional): Remove from heat and stir in the Alcohol-free vanilla extract and any spices you’re using.
8. Pour into Pan: Pour the caramel mixture into the prepared pan and spread evenly.
9. Cool Completely: Let the caramels cool completely at room temperature. This will take several hours, or you can speed up the process by placing the pan in the refrigerator.
10. Cut and Wrap: Once the caramels are firm, lift them out of the pan using the parchment paper overhang. Cut them into squares and wrap each caramel in wax paper.
Voila! You’ve just made Delicious Homemade Apple Cider Caramels for Fall Bliss. Now, try not to eat them all at once. Though, if you do, I completely understand.
Troubleshooting Your Caramel Catastrophes (and How to Avoid Them)
Okay, let’s be real. Sometimes things go wrong in the kitchen. Maybe your caramel is too soft, too hard, or just plain weird. Don’t worry, I’ve been there. Here are some common caramel catastrophes and how to avoid them:
- Caramel is too soft: This usually means you didn’t cook it to a high enough temperature. Next time, use a candy thermometer and make sure it reaches the firm-ball stage.
- Caramel is too hard: You cooked it too long! Again, a candy thermometer is your best friend. And don’t overcook it, even if you’re tempted.
- Caramel is grainy: This can happen if the sugar doesn’t dissolve completely. Stir constantly while cooking to prevent this.
- Caramel is burnt: Oops! You probably had the heat too high. Reduce the heat and stir more frequently.
Remember, practice makes perfect. Don’t get discouraged if your first batch isn’t perfect. Just keep trying, and you’ll be a caramel-making pro in no time. These Delicious Homemade Apple Cider Caramels for Fall Bliss will eventually be perfect.
Serving Suggestions: Beyond the Basic Bite
These caramels are delicious all on their own, but they’re also incredibly versatile. Here are some creative ways to enjoy them:
- Gift them: Package them in a cute box or jar and give them as gifts to friends, family, or coworkers.
- Add them to desserts: Chop them up and add them to cookies, brownies, or ice cream.
- Dip them in chocolate: Melt some chocolate and dip the caramels for an extra-indulgent treat.
- Use them in a caramel apple bar: Set out a variety of toppings (nuts, sprinkles, chocolate chips) and let your guests create their own caramel apples.
The possibilities are endless! Get creative and have fun with it. After all, cooking should be enjoyable. And eating caramel should definitely be enjoyable. This recipe for Delicious Homemade Apple Cider Caramels for Fall Bliss will elevate any desert.
Conclusion for Delicious Homemade Apple Cider Caramels for Fall Bliss:
These delicious homemade apple cider caramels for fall bliss are more than just a treat; they’re a taste of autumn in every bite. From the simmering cider to the perfectly wrapped squares, each step is a labor of love that results in a truly special confection. So, gather your ingredients, embrace the process, and prepare to be amazed by the sweet, tangy, and utterly irresistible flavor of homemade apple cider caramels. They are certain to become a fall family favorite!
Print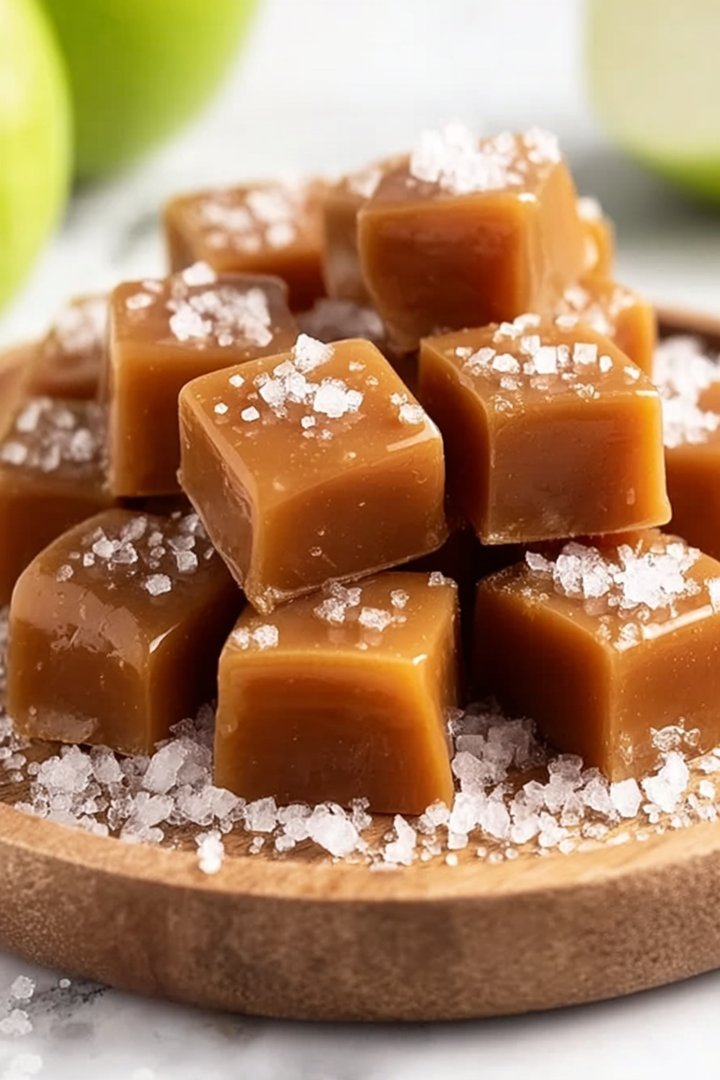
Delicious Homemade Apple Cider Caramels for Fall Bliss
Delicious delicious homemade apple cider caramels for fall bliss recipe with detailed instructions and nutritional information.
- Total Time: 35 minutes
- Yield: 4 servings 1x
Ingredients
- 1 cup (2 sticks) unsalted butter
- 1 cup packed light brown sugar
- 1 cup granulated sugar
- 1 cup heavy cream
- 1/2 cup apple cider
- 1/4 teaspoon salt
- 1 teaspoon vanilla extract
- 1/4 teaspoon apple pie spice
Instructions
- Step 1: Grease and line an 8×8 inch baking pan with parchment paper, leaving an overhang on the sides for easy removal.
- Step 2: In a heavy-bottomed saucepan, combine the butter, brown sugar, granulated sugar, heavy cream, apple cider, and salt. Cook over medium heat, stirring constantly until the sugar is dissolved.
- Step 3: Insert a candy thermometer and continue cooking, without stirring, until the mixture reaches 245°F (118°C), or firm-ball stage. This may take 20-30 minutes.
- Step 4: Remove the saucepan from the heat and stir in the vanilla extract and apple pie spice. Be careful, the mixture will bubble up.
- Step 5: Pour the caramel into the prepared baking pan and let it cool completely at room temperature for several hours, or overnight.
- Step 6: Once the caramel is firm, lift it out of the pan using the parchment paper overhang. Cut into small squares and wrap each caramel individually in wax paper. Store in an airtight container.
Notes
- Store individually wrapped caramels in a cool, dry place for up to two weeks to maintain their chewy texture.
- For a gooey treat, microwave a caramel for just a few seconds until slightly softened, but watch carefully to prevent melting.
- Serve these caramels as a delightful addition to a cheese board or alongside a warm cup of spiced cider.
- To prevent scorching, especially as the mixture thickens, keep a close eye on the caramel and lower the heat if needed, aiming for a gentle, even simmer.
- Prep Time: 15 minutes
- Cook Time: 20 minutes
- Method: Stovetop
- Cuisine: American
FAQs:
Can I use store-bought apple cider for these delicious homemade apple cider caramels for fall bliss?
Absolutely! While freshly pressed apple cider adds an extra layer of autumnal magic, store-bought works just fine. Just make sure it’s good quality, unfiltered apple cider. You are aiming for that concentrated apple flavor to shine through. The stronger the cider, the more intense and delightful your caramels will be. Consider reducing the cider slightly on the stovetop before you start the recipe for an even deeper apple essence. Trust me, these caramels are worth the effort, no matter which cider you choose.
What’s the best way to wrap these apple cider caramels?
Parchment paper squares are your best friend. Cut them slightly larger than your caramels, then individually wrap each one. This prevents them from sticking together and makes them perfect for gifting (or hoarding – we don’t judge!). You can also use cellophane wrappers for a more polished look. Twist the ends tightly to seal them up. A little ribbon or festive sticker adds a final touch of autumnal charm. Think of it as a tiny gift of deliciousness.
How do I prevent my caramels from being too hard or too soft?
The key is temperature control. Use a candy thermometer and keep a close eye on it. If the caramel reaches too high a temperature, it will be hard and brittle. Too low, and they’ll be gooey and sticky. Aim for the sweet spot, around 245°F (118°C). Also, humidity can play a role. On a humid day, they might take a little longer to set. Practice makes perfect, and even slightly imperfect caramels are still pretty darn delicious!
Can I add any other flavors to these homemade apple cider caramels for fall bliss?
Oh, the possibilities! A sprinkle of sea salt adds a lovely contrast to the sweetness. A dash of cinnamon or nutmeg enhances the autumnal spice. For a more sophisticated twist, consider adding a pinch of cardamom or ginger. Or, swirl in a little apple butter at the end for an even richer apple flavor. Get creative and make them your own! Just remember to taste as you go and adjust the flavors to your liking. These caramels are a blank canvas for your culinary creativity.


Leave a Comment