


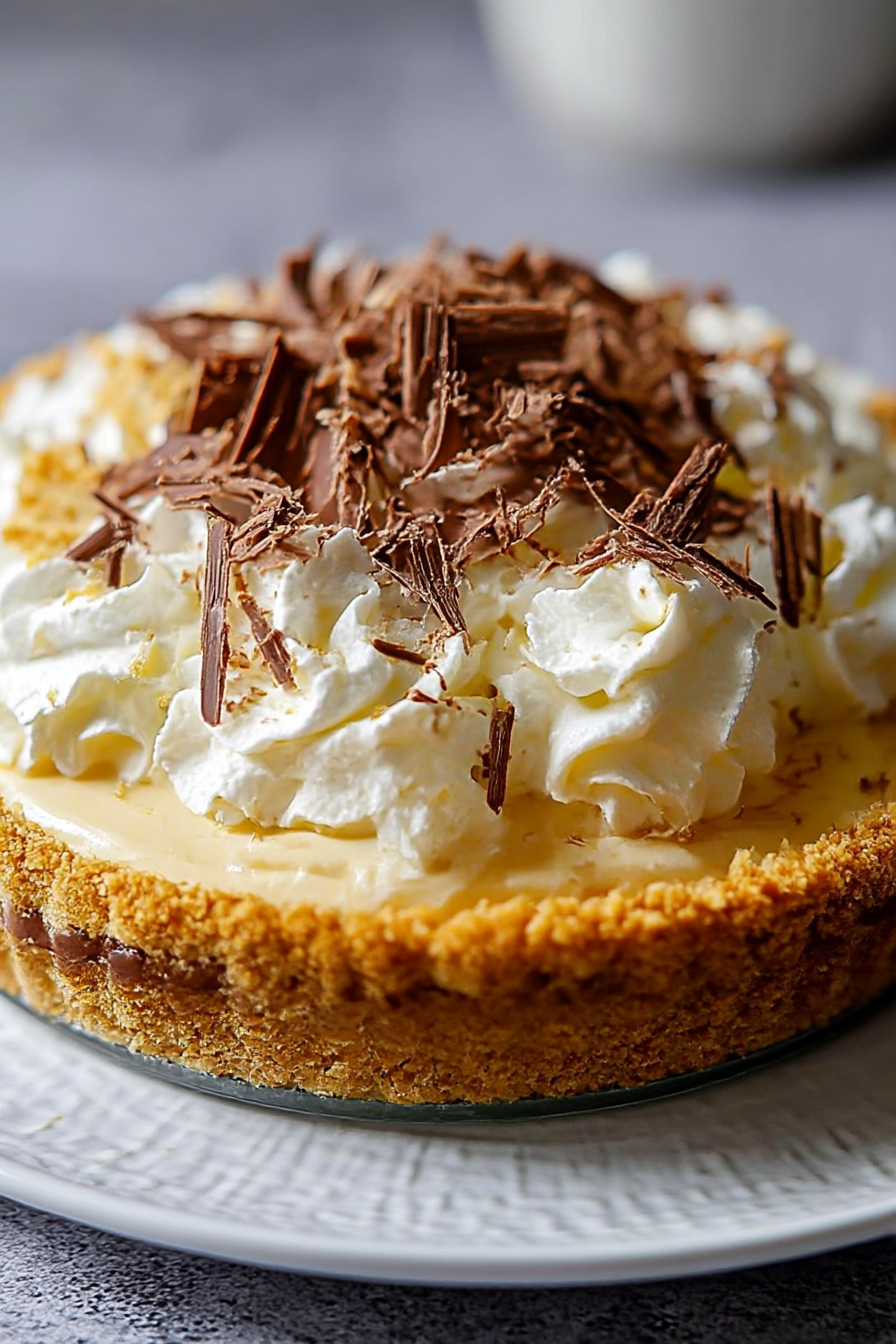
Banoffee Pie: a symphony of sweet, sticky caramel, creamy bananas, and a biscuit base that crumbles with every bite. It’s a dessert designed to elicit sighs of pure, unadulterated joy.
Imagine a dessert so decadently divine, it practically begs to be devoured. This Banoffee Pie recipe is not just a dessert; it’s a ticket to happiness.
- Effortlessly create a stunning dessert with simple, easy-to-follow instructions.
- Experience a delightful explosion of caramel, banana, and biscuit flavors in every bite.
- Achieve a visually impressive pie perfect for showcasing your baking skills.
- Adapt this recipe to cater to your taste preferences with optional toppings and variations.
Ingredients for Banoffee Pie
Here’s what you’ll need to make this delicious dish:
The full ingredients list, including measurements, is provided in the recipe card directly below.
How to Make Banoffee Pie
Follow these simple steps to prepare this delicious dish:
Step 1: Prepare the Biscuit Base
Crush the digestive biscuits into fine crumbs using a food processor or by placing them in a zip-lock bag and crushing them with a rolling pin. Melt the unsalted butter and mix it thoroughly with the biscuit crumbs until well combined.
Step 2: Press the Base into the Tin
Press the biscuit mixture into the base of a 9-inch pie tin or springform pan. Ensure the base is firmly packed and even. Chill in the refrigerator for at least 30 minutes to allow the base to set firmly.
Step 3: Make the Caramel
If you are not using ready-made caramel, place an unopened can of sweetened condensed milk in a large saucepan. Cover it completely with water and bring to a boil. Reduce heat and simmer for 3-4 hours, ensuring the can is always submerged in water. Let the can cool completely before opening (this can be done a day ahead). Alternatively, use a store-bought caramel sauce for a quicker option.
Step 4: Assemble the Pie
Spread the caramel evenly over the chilled biscuit base. Slice the bananas and arrange them neatly over the caramel layer.
Step 5: Make the Whipped Cream Topping
In a large bowl, whip the heavy cream with powdered sugar and Alcohol-free vanilla extract until stiff peaks form. Be careful not to overwhip.
Step 6: Top and Garnish
Spread the whipped cream evenly over the bananas. Garnish with chocolate shavings. Chill in the refrigerator for at least 1 hour before serving to allow the pie to set completely.
Transfer to plates and serve chilled for the perfect finishing touch.
Perfecting the Cooking Process
To ace this *Banoffee Pie* masterpiece, start by prepping your ingredients. Blind-bake the crust while you simmer the caramel. Assemble only when the crust is cool and the caramel is thick. This keeps the crust crisp and the caramel from running amok!
Add Your Touch
Feeling adventurous? Infuse your caramel with a touch of sea salt for a salted caramel *Banoffee Pie*. Or, swap out the regular bananas for plantains for a tropical twist. A sprinkle of cocoa powder on top adds a sophisticated touch.
Storing & Reheating
*Banoffee Pie* is best enjoyed fresh, but you can store it in the fridge for up to 2 days. However, be warned, the crust might soften. Sadly, reheating isn’t recommended, as the bananas will turn into a mushy mess.
Tips and Tricks to bake a Banoffee Pie
:
- Make sure to use ripe, but firm bananas. Mushy bananas will make your pie soggy, and nobody wants a soggy pie.
- Don’t overcook the caramel! Aim for a golden brown color and a thick, but pourable consistency to achieve perfect Banoffee Pie.
- Chilling the assembled *Banoffee Pie* for at least an hour before serving helps the flavors meld together beautifully, enhancing every bite.
(Personal anecdote formated as paragraph subheading)
I once made this for a friend’s birthday, and they declared it the “best thing they’d ever eaten.” Talk about a confidence boost! Now, it’s my go-to dessert for any celebration.
Let’s talk *Banoffee Pie*. This isn’t just a dessert; it’s a full-blown experience. We are going to tackle this beast together, step by delicious step. Forget complicated recipes and intimidating techniques. This is about fun, flavor, and creating something truly spectacular.
This *Banoffee Pie* journey starts with a buttery crust, followed by a luscious layer of homemade caramel, a mountain of sweet bananas, and a cloud of whipped cream. Are you drooling yet? You should be. This *Banoffee Pie* is an invitation to pure, unadulterated indulgence.
The Crust
: Your Foundation for *Banoffee Pie* Greatness
The crust is not just a vessel; it’s the stage upon which our *Banoffee Pie* drama unfolds. A good crust should be sturdy enough to hold all that gooey goodness, but also tender and crumbly enough to melt in your mouth.
Crust Ingredients
- 1 1/2 cups all-purpose flour
- 1/2 cup (1 stick) cold unsalted butter, cubed
- 1/4 cup granulated sugar
- 1/4 teaspoon salt
- 4-6 tablespoons ice water
Crust Instructions
1. In a large bowl, whisk together the flour, sugar, and salt.
2. Cut in the cold butter using a pastry blender or your fingertips until the mixture resembles coarse crumbs. This is crucial for a flaky crust. Don’t overmix!
3. Gradually add the ice water, one tablespoon at a time, mixing until the dough just comes together. Again, resist the urge to overwork the dough.
4. Form the dough into a disc, wrap it in plastic wrap, and chill in the refrigerator for at least 30 minutes. This allows the gluten to relax, resulting in a tender crust.
5. On a lightly floured surface, roll out the dough to a 12-inch circle. Transfer it to a 9-inch pie plate and crimp the edges.
6. Prick the bottom of the crust with a fork to prevent it from puffing up during baking. This is called “docking.”
7. Line the crust with parchment paper and fill with pie weights or dried beans. This is “blind baking,” and it ensures that the crust retains its shape.
8. Bake in a preheated oven at 375°F (190°C) for 20 minutes. Remove the pie weights and parchment paper and bake for another 10-15 minutes, or until the crust is golden brown.
9. Let the crust cool completely before filling.
The Caramel
: Liquid Gold for Your *Banoffee Pie*
Now, for the star of the show: the caramel. Don’t be intimidated! Homemade caramel is easier than you think, and the flavor is a million times better than anything you can buy in a jar. This will give your *Banoffee Pie* that rich, unforgettable taste.
Caramel Ingredients
- 1 cup granulated sugar
- 1/4 cup water
- 1/2 cup heavy cream, warmed
- 4 tablespoons (1/2 stick) unsalted butter, cut into pieces
- 1/2 teaspoon sea salt (optional, but highly recommended)
Caramel Instructions
1. In a medium saucepan, combine the sugar and water. Cook over medium heat, without stirring, until the sugar dissolves and the mixture turns a deep amber color. This requires patience! Don’t walk away from the stove.
2. Carefully remove the saucepan from the heat and pour in the warm heavy cream. Be careful, as the mixture will bubble up violently.
3. Stir in the butter and sea salt (if using) until smooth.
4. Let the caramel cool slightly before pouring it into the cooled crust.
The Bananas
: Sweetness and Creaminess Together
Let’s talk bananas! This is where *Banoffee Pie* gets its name and its signature sweetness. Choose ripe, but firm bananas for the best texture and flavor.
Banana Ingredients
- 3-4 ripe, but firm bananas, sliced
Banana Instructions
1. Arrange the banana slices evenly over the cooled caramel layer.
The Whipped Cream
: A Light and Airy Dream on Banoffee Pie
To finish off our *Banoffee Pie*, we need a cloud of light and airy whipped cream. This adds a touch of elegance and balances the richness of the caramel and bananas.
Whipped Cream Ingredients
- 1 cup heavy cream, cold
- 2 tablespoons powdered sugar
- 1/2 teaspoon Alcohol-free vanilla extract
Whipped Cream Instructions
1. In a large bowl, beat the heavy cream with an electric mixer until soft peaks form.
2. Add the powdered sugar and Alcohol-free vanilla extract and continue to beat until stiff peaks form. Be careful not to overwhip!
3. Spread the whipped cream evenly over the banana layer.
4. Garnish with chocolate shavings, cocoa powder, or extra banana slices, if desired.
5. Chill in the refrigerator for at least 30 minutes before serving. This allows the flavors to meld together and the whipped cream to set.
Serving Your *Banoffee Pie*
Slice and serve your *Banoffee Pie* with a smile. Prepare for oohs and aahs. This dessert is a guaranteed crowd-pleaser. It’s the perfect ending to any meal, or a special treat for any occasion.
Variations on a Theme
: Enhancing Your Banoffee Pie
Want to take your *Banoffee Pie* to the next level? Here are a few ideas:
- **Chocolate Lover’s Dream:** Add a layer of melted chocolate to the bottom of the crust before adding the caramel.
- **Nutty Delight:** Sprinkle chopped nuts (like walnuts or pecans) over the caramel or whipped cream.
- **Coffee Kick:** Add a tablespoon of instant coffee to the caramel for a mocha twist.
Troubleshooting Your *Banoffee Pie*
Sometimes, things don’t go exactly as planned. Here are a few common *Banoffee Pie* problems and how to fix them:
- **Soggy Crust:** Make sure to blind bake your crust properly. Also, avoid using overly ripe bananas.
- **Runny Caramel:** Cook the caramel long enough to reach the desired consistency.
- **Flat Whipped Cream:** Make sure your heavy cream is cold and avoid overwhipping.
Conclusion for Banoffee Pie :
So, there you have it: a Banoffee Pie recipe that’s easy, delicious, and guaranteed to impress. We covered everything from preventing soggy crusts to unleashing your inner dessert artist with fun variations. This isn’t just a pie; it’s an experience, a crowd-pleaser, and a testament to the fact that simple ingredients, when combined with a little love (and butter), can create something truly extraordinary. Go forth and bake! Let your friends and family enjoy this incredible dessert.
Print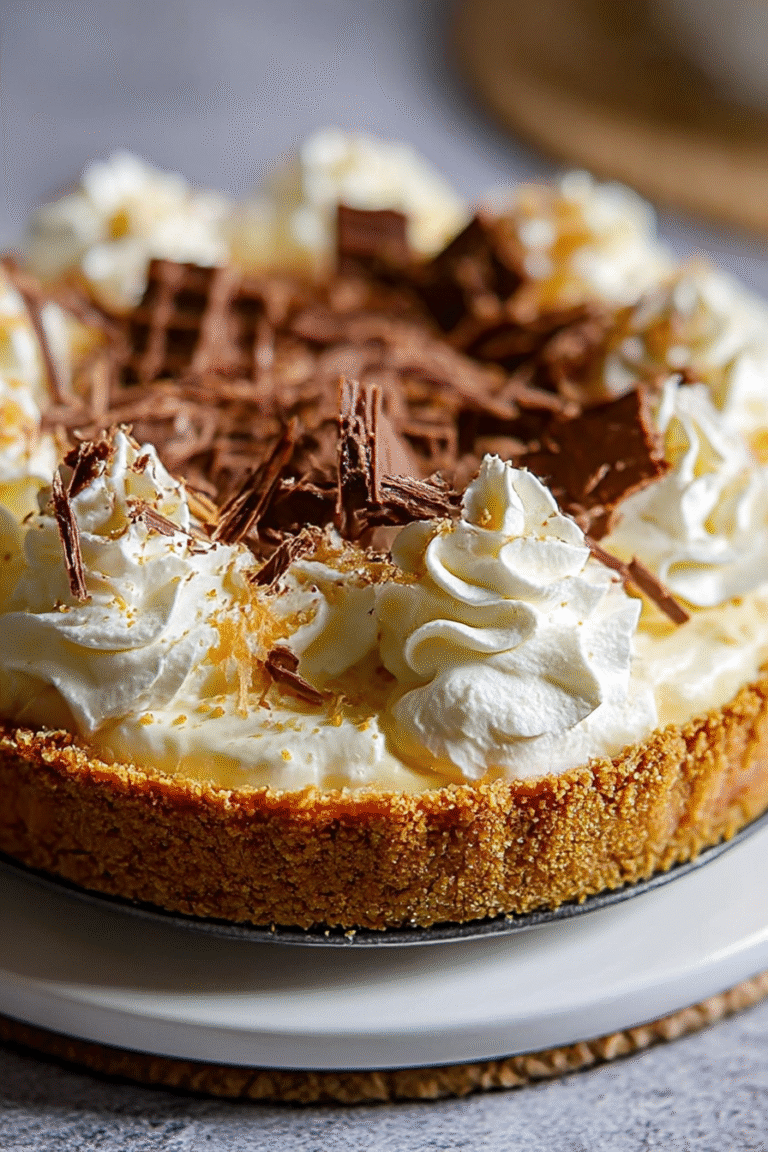
Banoffee Pie
Delicious banoffee pie recipe with detailed instructions and nutritional information.
- Total Time: 35 minutes
- Yield: 4 servings
Ingredients
- Digestive biscuits: 250g
- Unsalted butter: 100g, melted
- Sweetened condensed milk: 397g (1 can)
- Golden syrup: 2 tablespoons
- Bananas: 2-3, ripe but firm
- Double cream: 300ml
- Icing sugar: 1 tablespoon
- Chocolate shavings: for decoration (optional)
Instructions
- Step 1: Crush the digestive biscuits into fine crumbs using a food processor or by placing them in a sealed bag and crushing with a rolling pin. Mix the biscuit crumbs with the melted butter until well combined.
- Step 2: Press the biscuit mixture firmly into the base of a 23cm pie dish or tart tin. Use the back of a spoon to create an even layer. Refrigerate for at least 30 minutes to firm up.
- Step 3: While the base is chilling, make the caramel. In a saucepan, combine the sweetened condensed milk and golden syrup. Cook over low heat, stirring constantly, for 15-20 minutes until the mixture thickens and turns a deep golden brown colour. Let cool slightly.
- Step 4: Spread the cooled caramel evenly over the biscuit base. Slice the bananas and arrange them neatly over the caramel layer.
- Step 5: Whip the double cream with the icing sugar until soft peaks form. Spoon or pipe the whipped cream over the bananas.
- Step 6: Sprinkle chocolate shavings over the cream, if desired. Refrigerate for at least 1 hour before serving to allow the pie to set properly.
Notes
- Banoffee pie is best stored in the refrigerator and enjoyed within 2-3 days to prevent the bananas from browning.
- Avoid reheating Banoffee pie as it will melt the cream and soften the biscuit base.
- For an extra touch, sprinkle a pinch of sea salt over the caramel layer to enhance the sweetness.
- Ensure your bananas are ripe but still firm; overly ripe bananas will become mushy on the pie.
- Prep Time: 15 minutes
- Cook Time: 20 minutes
- Method: Stovetop
- Cuisine: American
FAQs :
What makes this Banoffee Pie recipe so special?
Alright, picture this: you’re at a party, and everyone’s eyeing the dessert table, right? But there it is, the undisputed star! This Banoffee Pie recipe? It’s not just special; it’s legendary! Forget those soggy, bland versions. This one boasts a buttery, crunchy biscuit base, a generous layer of creamy caramel (made without any fancy techniques!), perfectly ripe bananas, and a cloud of whipped cream that’s basically edible happiness. Trust me, once you taste this, you will keep coming back for more. It is simple, easy, and delicious. What else could you ask for?
Can I make this Banoffee Pie ahead of time?
Absolutely! In fact, I highly recommend it. Think of it as a tasty little time capsule. You can assemble the entire pie up to 24 hours in advance. Just be sure to keep it refrigerated. This allows the flavors to meld together beautifully, like a culinary symphony in your fridge. However, I would suggest holding off on adding the banana slices until just before serving to prevent them from browning. Nobody likes brown bananas! Just a little tip to ensure your pie is as good as it can be.
How do I prevent the biscuit base from becoming soggy?
Ah, the age-old question! Nobody wants a soggy bottom, especially not on their Banoffee Pie. The secret? Melted butter, my friend. Make sure the crushed biscuits are thoroughly coated with melted butter before pressing them into your pie dish. Press firmly to create a compact, even layer. Baking the crust for a short time also helps to solidify it and create a moisture barrier. Think of it like waterproofing your dessert foundation! You can also use a food processor to help blend the biscuits and butter evenly.
What are some variations I can try with this Banoffee Pie?
Feeling adventurous? Let’s remix this Banoffee Pie! How about adding a sprinkle of chopped toasted nuts (walnuts, pecans, or almonds work beautifully) to the biscuit base for extra crunch? Or drizzle some melted dark or milk chocolate over the whipped cream for an added layer of decadence. For a tropical twist, try using coconut whipped cream and a sprinkle of toasted coconut flakes. Get creative and have fun with it! This Banoffee Pie is just a canvas for your dessert dreams.


Leave a Comment