

Imagine biting into juicy chicken, glazed with a vibrant, tangy sauce that dances on your tongue. The aroma of sweet and sour goodness fills your kitchen, promising a meal that’s both comforting and exciting.
This Baked Sweet and Sour Chicken recipe brings back memories of carefree family dinners and potlucks, where everyone gathered around a table laden with delicious food. With a perfect balance of sweetness and acidity, this dish is ideal for busy weeknights or casual weekend gatherings. Get ready to tantalize your taste buds!
Here’s why you’ll absolutely adore this Baked Sweet and Sour Chicken:
- It combines juicy chicken with a homemade sweet and sour sauce that’s bursting with flavor, creating an unforgettable culinary experience.
- Preparation is surprisingly simple, requiring minimal hands-on time, which makes it perfect for busy weeknights or spontaneous family dinners.
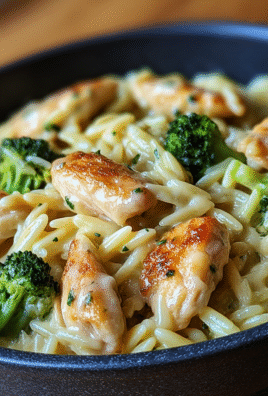
- The vibrant, glossy glaze on the chicken makes it visually appealing, turning an everyday meal into a show-stopping centerpiece.
- This recipe is incredibly versatile; it pairs perfectly with rice, noodles, or roasted vegetables, offering endless possibilities.
Ingredients for Baked Sweet and Sour Chicken
Here’s what you’ll need to make this delicious dish:
The full ingredients list, including measurements, is provided in the recipe card directly below.
How to Make Baked Sweet and Sour Chicken
Follow these simple steps to prepare this delicious dish:
Step 1: Prepare the Chicken and Vegetables
Preheat your oven to 375°F (190°C). While the oven heats up, cut the bell peppers and onion into bite-sized pieces. Toss the boneless, skinless chicken thighs with a drizzle of olive oil, salt, and pepper.
Step 2: Sauté the Vegetables
Heat a large skillet over medium heat. Add the chopped bell peppers and onion to the skillet and sauté for about 5-7 minutes, until they are slightly softened. This will bring out their natural sweetness.
Step 3: Make the Sweet and Sour Sauce
In a medium bowl, whisk together the ketchup, apple cider vinegar, brown sugar, low sodium soy sauce, cornstarch, garlic powder, and ginger powder. Ensure there are no lumps and the sauce is well combined.
Step 4: Combine and Bake
Add the sautéed vegetables and pineapple chunks to a 9×13 inch baking dish. Arrange the seasoned chicken thighs on top of the vegetables and pineapple. Pour the sweet and sour sauce evenly over the chicken and vegetables.
Step 5: Bake to Perfection
Cover the baking dish with aluminum foil and bake for 30 minutes. After 30 minutes, remove the foil and bake for an additional 15-20 minutes, or until the chicken is cooked through and the sauce has thickened. The internal temperature of the chicken should reach 165°F (74°C).
Step 6: Serve and Enjoy
Remove the Baked Sweet and Sour Chicken from the oven and let it rest for a few minutes before serving. Serve hot over rice or noodles, garnished with fresh green onions or sesame seeds for an extra touch of flavor and presentation.
Perfecting the Cooking Process

To truly master this Baked Sweet and Sour Chicken, remember the order of operations! First, give your chicken a good sear to lock in those juices. While it’s baking, get your rice or veggies going, then whip up that incredible sweet and sour sauce. Timing is everything!
Add Your Touch
Want to make this Baked Sweet and Sour Chicken recipe your own? Go for it! Try swapping pineapple for mango chunks, or add a pinch of red pepper flakes for a kick. Don’t be afraid to experiment with different veggies, either. Broccoli, bell peppers, or even snap peas would be amazing.
Storing & Reheating
Leftover Baked Sweet and Sour Chicken is practically a gift to your future self. Store it in an airtight container in the fridge for up to four days. To reheat, just pop it in the microwave or oven until heated through. A splash of broth can revive the sauce beautifully!
Here are some pro tips to guide you toward Baked Sweet and Sour Chicken perfection:
- Don’t overcrowd the pan when searing the chicken; this lowers the heat and leads to steaming instead of browning. Sear in batches for best results.
- Taste and adjust your sauce! If it’s too sweet, add a splash of vinegar; too sour, a touch more honey. Find your perfect balance.
- Let the Baked Sweet and Sour Chicken rest for a few minutes after baking before serving. This allows the juices to redistribute, resulting in more tender chicken.
(Personal anecdote formated as paragraph subheading)
I remember the first time I made this for a potluck. Everyone raved about it, and my friend swore I had secretly ordered takeout! That’s when I knew this recipe was a keeper.
Baked Sweet and Sour Chicken: A Culinary Adventure
Alright, buckle up, buttercups! We’re about to embark on a culinary journey that’s equal parts delicious and delightful. Today, we’re diving headfirst into the world of Baked Sweet and Sour Chicken. Forget those gloopy, mystery-meat versions you’ve encountered before. This is the real deal: flavorful, fresh, and surprisingly simple to make at home. Now, I know what you might be thinking: “Sweet and sour chicken? Isn’t that, like, totally 1980s?” And to that, I say, “So what if it is? Good food is timeless!” Besides, we’re giving this classic a modern makeover. Think less neon-red sauce and more vibrant, homemade goodness. This isn’t your grandma’s sweet and sour chicken (unless your grandma is a total rockstar in the kitchen, in which case, kudos to Grandma!). We’re talking succulent chicken, a tangy sauce that’ll make your taste buds sing, and a whole lot of good times in the kitchen. So, grab your apron, crank up the tunes, and let’s get cooking! Are you ready to transform simple ingredients into a masterpiece that will impress your family and friends? Let’s go!
Why This Baked Sweet and Sour Chicken Recipe Rocks
Before we dive into the nitty-gritty, let’s talk about why you should even bother with this Baked Sweet and Sour Chicken recipe in the first place. I mean, there are a million recipes out there, right? Well, here’s the thing: this one is different. It’s better. (Okay, maybe I’m a little biased, but hear me out!)
- **It’s healthier than takeout:** Let’s face it, takeout sweet and sour chicken can be a bit of a mystery. What’s in that sauce? How much sugar are we talking about here? With this recipe, you’re in control. You know exactly what’s going into your food, so you can feel good about what you’re eating.
- **It’s surprisingly easy:** Don’t let the fancy name fool you. This recipe is totally doable, even for kitchen newbies. We’re talking basic techniques, simple ingredients, and minimal fuss. Trust me, if I can do it, you can do it!
- **It’s totally customizable:** Want to add more veggies? Go for it! Prefer pineapple to bell peppers? No problem! This recipe is a blank canvas for your culinary creativity.
- **It’s a crowd-pleaser:** This Baked Sweet and Sour Chicken is a guaranteed hit with kids and adults alike. Serve it with rice, noodles, or even just on its own. It’s perfect for weeknight dinners, potlucks, or even a fancy dinner party (if you’re feeling ambitious).
- **The flavor is incredible:** Last but not least, this recipe just tastes amazing. The combination of sweet, sour, and savory flavors is simply irresistible. I dare you to try it and not go back for seconds (or thirds!).
So, are you convinced yet? I hope so! Because we’re about to get down to business and create some serious kitchen magic. Let’s do this!
Gathering Your Arsenal: Ingredients You’ll Need
Alright, before we even think about turning on the oven, let’s make sure we have all the right tools and ingredients. Think of this as your culinary arsenal. You wouldn’t go into battle without your sword and shield, would you? (Okay, maybe that’s a bit dramatic, but you get the idea.) Here’s what you’ll need to make this Baked Sweet and Sour Chicken sing:
**For the Chicken: **
- 1.5 lbs boneless, skinless chicken breasts, cut into bite-sized pieces: Chicken thighs work too, if you’re feeling adventurous.
- 1/2 cup cornstarch: This is the secret to crispy chicken without deep-frying.
- 1 teaspoon garlic powder: Because everything’s better with garlic.
- 1/2 teaspoon salt: Just a pinch to enhance the flavor.
- 1/4 teaspoon black pepper: Freshly ground is always best.
- 1 tablespoon olive oil: For searing the chicken to golden perfection.
**For the Sweet and Sour Sauce: **
- 1 cup chicken broth: This forms the base of our flavorful sauce.
- 1/2 cup apple cider vinegar: Adds that essential tang.
- 1/2 cup packed brown sugar: For that sweet, caramelized goodness.
- 1/4 cup ketchup: Trust me on this one. It adds depth and richness.
- 2 tablespoons soy sauce: Adds umami and balances the sweetness.
- 1 tablespoon cornstarch: To thicken the sauce to perfection.
- 1 tablespoon olive oil
- 1 red bell pepper, cut into bite-sized pieces: Adds color and sweetness.
- 1 green bell pepper, cut into bite-sized pieces: Ditto.
- 1 onion, cut into bite-sized pieces: Adds savory depth.
- 1 (20 ounce) can pineapple chunks, drained: Because sweet and sour just isn’t complete without pineapple!
**Optional Add-Ins: **
- Sesame seeds, for garnish: Adds a touch of elegance.
- Chopped green onions, for garnish: Adds a pop of freshness.
- Red pepper flakes, for a touch of heat: If you’re feeling spicy!
Once you’ve gathered all your ingredients, take a deep breath and admire your handiwork. You’re one step closer to Baked Sweet and Sour Chicken greatness!
Step-by-Step: Bringing the Magic to Life
Okay, now for the fun part! Let’s turn these humble ingredients into a culinary masterpiece. Don’t worry, I’ll guide you every step of the way. Just follow along, and we’ll have this Baked Sweet and Sour Chicken on the table in no time.
1. **Prep the Chicken: ** In a large bowl, toss the chicken pieces with cornstarch, garlic powder, salt, and pepper. Make sure each piece is evenly coated. This is what gives us that crispy texture when baking.
2. **Sear the Chicken: ** Heat the olive oil in a large skillet over medium-high heat. Add the chicken in a single layer (you might need to do this in batches to avoid overcrowding the pan) and sear for 2-3 minutes per side, until golden brown. The chicken doesn’t need to be fully cooked at this point; we’re just browning it for flavor and texture. Remove the chicken from the skillet and set aside.
3. **Sauté the Veggies: ** In the same skillet, add the bell peppers and onion. Cook for 5-7 minutes, until softened. Add a little extra olive oil if needed.
4. **Make the Sauce: ** In a medium saucepan, whisk together the chicken broth, apple cider vinegar, brown sugar, ketchup, soy sauce, and cornstarch. Bring to a simmer over medium heat, stirring constantly, until the sauce thickens (about 3-5 minutes).
5. **Combine and Bake: ** Add the seared chicken, sautéed veggies, and pineapple chunks to the saucepan with the sweet and sour sauce. Stir to combine, then pour everything into a greased 9×13 inch baking dish.
6. **Bake: ** Bake in a preheated oven at 375°F (190°C) for 20-25 minutes, or until the chicken is cooked through and the sauce is bubbly.
7. **Garnish and Serve: ** Remove the Baked Sweet and Sour Chicken from the oven and let it rest for a few minutes before serving. Garnish with sesame seeds and chopped green onions, if desired. Serve with rice, noodles, or your favorite side dish.
And there you have it! A beautiful, delicious, and totally homemade Baked Sweet and Sour Chicken that’s sure to impress. Pat yourself on the back; you deserve it!
Serving Suggestions: Elevating Your Baked Sweet and Sour Chicken Experience
Now that you’ve created this masterpiece, let’s talk about how to serve it up in style. Baked Sweet and Sour Chicken is a versatile dish that pairs well with a variety of sides. Here are a few of my favorite serving suggestions:
- **Classic Rice:** You can’t go wrong with a bed of fluffy white rice or brown rice. It’s the perfect way to soak up all that delicious sweet and sour sauce.
- **Noodles:** Egg noodles or rice noodles are another great option. Toss them with a little sesame oil and soy sauce for extra flavor.
- **Quinoa:** For a healthier option, try serving your Baked Sweet and Sour Chicken with quinoa. It’s packed with protein and fiber, and it has a nice nutty flavor that complements the dish.
- **Steamed Vegetables:** Add some extra nutrients to your meal with steamed broccoli, asparagus, or green beans.
- **Salad:** A crisp green salad with a light vinaigrette dressing is a refreshing contrast to the rich flavors of the Baked Sweet and Sour Chicken.
No matter how you choose to serve it, be sure to garnish your Baked Sweet and Sour Chicken with a sprinkle of sesame seeds and chopped green onions. It adds a touch of elegance and freshness that really elevates the dish.
Perfecting the Cooking Process
To make this Baked Sweet and Sour Chicken shine, sear the chicken pieces first; that seals in flavor and creates a delightful texture. While the chicken finishes in the oven, prepare your rice and whip up that delicious sweet and sour sauce. Timing is key!
Add Your Touch
Want to customize this Baked Sweet and Sour Chicken? Absolutely! Swap the pineapple for your favorite fruit, like mango or cherries. Add other vegetables such as carrots or snow peas. A dash of chili garlic sauce can also introduce a pleasant warmth.
Storing & Reheating
Store leftover Baked Sweet and Sour Chicken in an airtight container in the refrigerator for up to 3 days. Reheat gently in the microwave or oven until warmed through. Adding a splash of broth can help maintain moisture when reheating.
Here are some pro tips to elevate your Baked Sweet and Sour Chicken game:
- Ensure chicken pieces are uniformly sized before cooking to ensure even cooking and prevent some pieces from drying out while others remain undercooked.
- Balance your sauce’s flavor by adjusting the sweet and sour elements to your liking. A little extra vinegar for tang or honey for sweetness can tailor the taste.
- Don’t overbake the chicken! Keep an eye on it and check for doneness to ensure it stays juicy and doesn’t become tough or dry.
(Personal anecdote formated as paragraph subheading)
My kids are usually picky eaters, but they devour this Baked Sweet and Sour Chicken. It’s a lifesaver on busy weeknights when I need a guaranteed crowd-pleaser.
Conclusion for Baked Sweet and Sour Chicken :
This Baked Sweet and Sour Chicken recipe is a delightful twist on a beloved classic. It brings all the tangy and savory flavors you crave, without the guilt of frying. It’s incredibly versatile, allowing for substitutions and customizations to suit your taste. Whether you’re looking for a quick weeknight dinner or a dish to impress, this recipe is sure to deliver. So, gather your ingredients, preheat your oven, and get ready to enjoy a delicious, home-baked treat that will leave everyone wanting more.
Print
Baked Sweet and Sour Chicken
Delicious baked sweet and sour chicken recipe with detailed instructions and nutritional information.
- Total Time: 35 minutes
- Yield: 4 servings
Ingredients
- Chicken breasts, boneless and skinless: 2 lbs, cut into 1-inch cubes
- All-purpose flour: 1/2 cup
- Egg: 1 large, beaten
- Pineapple chunks: 1 (20 ounce) can, drained (reserve juice)
- Green bell pepper: 1 large, cut into 1-inch pieces
- Red bell pepper: 1 large, cut into 1-inch pieces
- Sweet and Sour Sauce: 1 cup (store-bought or homemade using reserved pineapple juice, soy sauce, vinegar, sugar, ketchup)
- Vegetable oil: 2 tablespoons
Instructions
- Step 1: Preheat oven to 375°F (190°C). Lightly grease a 9×13 inch baking dish.
- Step 2: In a bowl, dredge the chicken cubes in flour, then dip them in the beaten egg.
- Step 3: Heat vegetable oil in a large skillet over medium-high heat. Lightly brown the chicken cubes on all sides. (Do not cook through)
- Step 4: In the prepared baking dish, combine the browned chicken, pineapple chunks, green bell pepper, and red bell pepper.
- Step 5: Pour the sweet and sour sauce evenly over the chicken and vegetables.
- Step 6: Bake in the preheated oven for 30-40 minutes, or until the chicken is cooked through and the vegetables are tender. Serve hot over rice.
Notes
- Store leftover baked chicken in an airtight container in the refrigerator for up to 3 days.
- For best results, reheat in the oven at 350°F (175°C) until warmed through, preventing sogginess.
- Serve this dish over fluffy white rice or quinoa for a complete and satisfying meal.
- Browning the chicken in batches prevents overcrowding the pan, ensuring even color and texture.
- Prep Time: 15 minutes
- Cook Time: 20 minutes
- Method: Stovetop
- Cuisine: American
FAQs :
Can I use a different type of meat for this Baked Sweet and Sour Chicken recipe?
Absolutely! While this recipe shines with chicken, feel free to experiment. Turkey breast cut into bite-sized pieces would be a fantastic substitute. You could even try beef – just ensure you tenderize it well before cooking. The beauty of baked sweet and sour goodness is its versatility. Remember to adjust cooking times slightly depending on the meat you choose, making sure it’s cooked through before you slather on that delectable sweet and sour sauce. Get creative and find your perfect meaty match!
How can I make this Baked Sweet and Sour Chicken healthier?
If you’re looking to lighten things up, this recipe is already a great start being baked! You can reduce the amount of added sugar in the sauce by using a sugar alternative or simply cutting back on the amount used. Also, load up on the veggies! Adding more bell peppers, onions, and even broccoli will not only increase the nutritional value but also add vibrant colors and textures to your dish. Opt for a leaner cut of chicken to minimize the fat content, and you’ll have a guilt-free version of this classic dish!
What are some good side dishes to serve with Baked Sweet and Sour Chicken?
This Baked Sweet and Sour Chicken pairs perfectly with a variety of sides. Steamed rice is always a classic choice, soaking up all that flavorful sauce. For a healthier option, try cauliflower rice or quinoa. Roasted vegetables like asparagus or green beans would also complement the dish nicely. If you’re feeling adventurous, consider a side of sesame noodles or even a simple salad with a light vinaigrette. The possibilities are endless, so choose what tickles your fancy!
How do I store leftovers and reheat this Baked Sweet and Sour Chicken?
Storing leftovers is a breeze! Once your Baked Sweet and Sour Chicken has cooled completely, transfer it to an airtight container. It will keep in the refrigerator for up to 3-4 days. When you’re ready to reheat, you have a couple of options. You can microwave it for a quick and easy meal, or you can reheat it in the oven for a crispier texture. Adding a splash of broth or juice when reheating can help keep the chicken moist and prevent it from drying out.


Leave a Comment